
Toilet Not Flushing? The Real Fix (Not Just a Plunger)
- ty8429
- Aug 20
- 11 min read
A toilet not flushing is almost always one of two things: a mechanical problem inside the tank, or a clog somewhere in the bowl or trap. Check the tank first. If the handle feels loose, the chain has slipped off the flapper, or the water level looks low, you’ve likely found your answer without touching a plunger.
Before anything else, find the shutoff valve behind or beside the toilet base and turn it clockwise. That single move stops an overflow if you’re mid-troubleshoot and things go sideways. Once the water’s off, try three quick things: jiggle the handle to see if the chain reconnects, pour a bucket of water into the bowl to see if it clears, and if the bowl is full and won’t drain, grab a flange plunger before anything else.
One repair provider surveyed its own service calls and found that about 70% of toilet flush failures trace back to simple mechanical fixes homeowners can handle themselves. Texas Comfort Crew sees this split play out constantly across the Greater San Antonio area: most calls end with a five-minute part swap, not a truck full of equipment.
Pro Tip: Keep one hand near the shutoff valve the entire time you’re testing fixes. If water starts creeping toward the rim, you want that valve closed in two seconds, not twenty.
Key Takeaways
Most toilets that won’t flush are fixed by checking the tank mechanism first and reserving the plunger or auger for confirmed drain clogs.
Point | Details |
Shut off water first | Locate and close the supply valve immediately to prevent overflow while you diagnose. |
Check the tank before the drain | Handle, chain slack, flapper, and water level cause most single-toilet flush failures. |
Use the right plunger | A flange plunger seals the drain far better than a flat cup style for toilet clogs. |
Know the multi-fixture warning sign | If several toilets fail at once, suspect the mainline, not any single tank. |
Call in the pros when needed | Texas Comfort Crew handles diagnostic visits, camera inspections, and hydro-jetting across Greater San Antonio when DIY fixes stall. |
Table of Contents
How Do I Fix a Toilet That Won’t Flush Right Now?
Getting water moving again doesn’t require a toolbox. It requires the right sequence, done in the right order, so you don’t waste ten minutes on the wrong fix.
Try the bucket flush first. Fill a large bucket, at least two gallons, and pour it into the bowl fast and from about waist height. The volume and speed mimic the siphon action a real flush creates. Homeowners can use this as a genuine temporary remedy while you sort out the real cause.
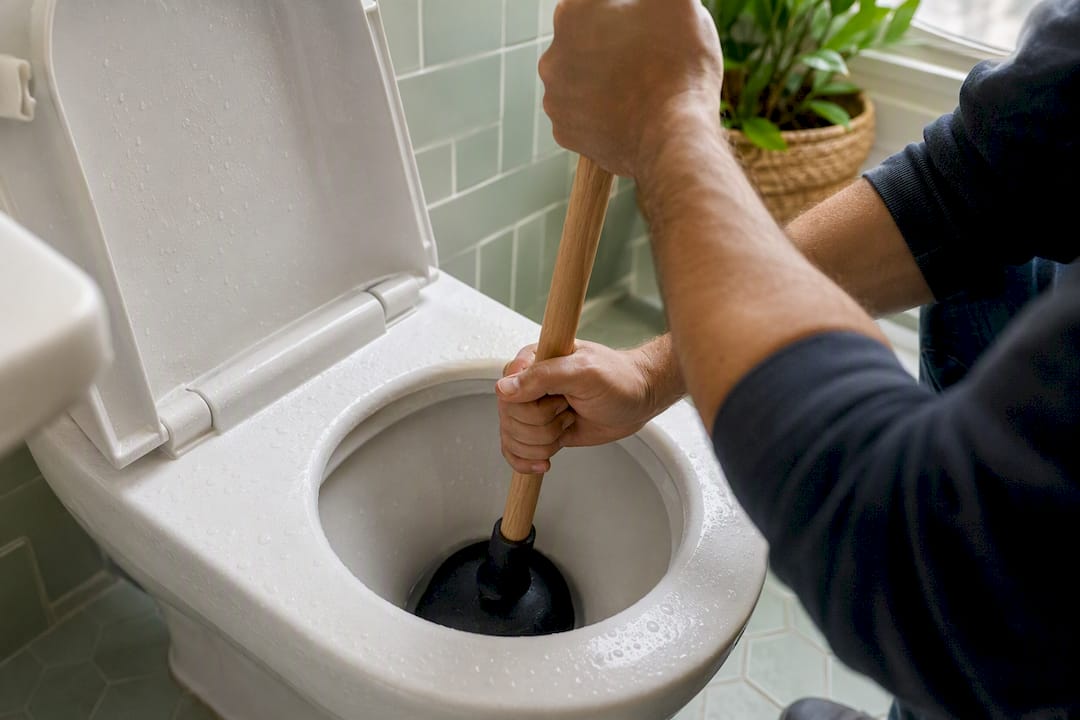
If the bowl is full and not draining, plunge it. Use a flange plunger, not the flat cup style, since the extra rubber flap seals the drain opening far better. Push down slowly to release trapped air, then plunge hard for 15 to 20 seconds before breaking the seal.
Still stuck? Move to a toilet auger. Feed the cable into the trap, crank the handle clockwise as you push, and pull back slowly once you feel resistance give way.
Tools that make this easier:
A flange plunger (the cup-only kind won’t seal properly)
A toilet auger, also called a closet auger, for clogs a plunger can’t reach
A large bucket for the manual flush and cleanup
Stop immediately if water starts rising toward the rim, if you smell sewage, or if a second fixture in the house starts acting up at the same time. Those are signs the problem isn’t isolated to this one toilet, and pushing harder with a plunger won’t help.
Pro Tip: Angle the plunger slightly so the flange seats fully into the drain hole before you push. A half-sealed plunger just moves air around the bowl instead of building the pressure that clears a clog.
Is the Problem in the Tank or in the Drain?
This is the fork in the road. Fix the wrong side and you’ll waste an afternoon. Here’s how to tell them apart fast.
Start with what you can see. Lift the tank lid and watch what happens when someone presses the handle.
Look at the flapper. Press the handle and watch it lift. If it barely rises, or drops back down before the tank empties, that’s your weak flush right there. A warped or waterlogged flapper needs replacing.
Check chain slack. Korky recommends about one to two links of slack, roughly a quarter to a half inch. Too tight, and the flapper can’t seal. Too loose, and it won’t lift high enough to let water through.
Check the tank water level. It should sit about an inch below the top of the overflow tube. If it’s lower, the float is set wrong or the fill valve is failing.
Check the refill tube. This thin tube should run into the overflow pipe, not dangle beside it. If it’s disconnected, the bowl won’t refill properly even though the tank fills fine.
Inspect the rim jets. Use a small mirror or flashlight to look under the bowl’s rim. Mineral crust here chokes the swirl that creates a strong flush.
Now check the bowl and drain. If the bowl fills with water that rises high and drains slowly, or gurgles instead of swirling clean, the clog sits past the trap, not in the tank.
Quick signs pointing to a tank issue:
Weak trickle instead of a rush of water
Flapper doesn’t lift fully or drops early
Bowl doesn’t refill to the normal level
Quick signs pointing to a clog or drain issue:
Bowl water rises instead of draining when you press the handle
Gurgling sounds from the tub or sink when the toilet runs
More than one toilet in the house is failing at once
A simple pour test helps confirm which side you’re on. Pour three gallons of water into the bowl at a steady pace. If it drains normally, your tank mechanism is the culprit. If it backs up or drains slowly, you’re dealing with a blockage further down the line.
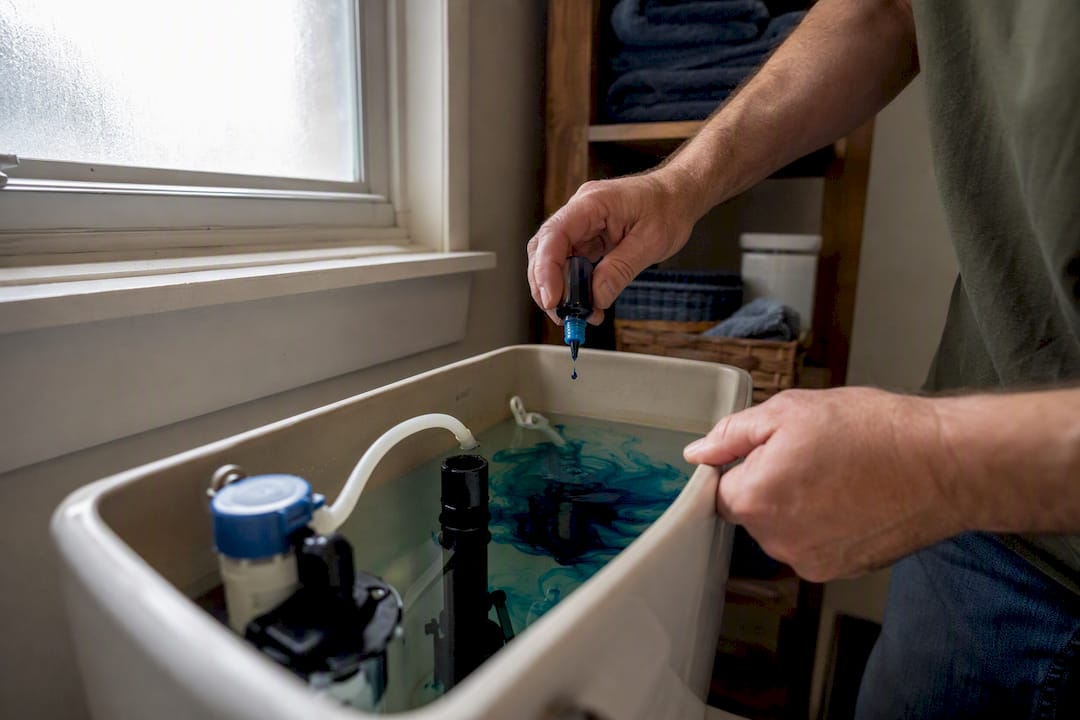
There’s also a leak test worth running while you’re in there. Drop a few drops of food coloring into the tank and wait 15 minutes without flushing. Color in the bowl means the flapper isn’t sealing, even if it looks fine visually, and that slow leak can throw off water levels enough to weaken every flush.
Mineral buildup and worn seats often reduce flush strength gradually rather than all at once, which is why a toilet that flushed fine last month can start struggling without any obvious single cause. Before you replace anything, adjust the flapper’s chain slack and retest with a small amount of toilet paper. It’s the cheapest fix available and solves more cases than people expect.
Always shut off the supply valve before opening the tank fully, wear gloves when handling tank water, and never mix cleaning chemicals, especially bleach and ammonia-based products, since the fumes can be dangerous in an enclosed bathroom.
Pro Tip: If the flapper looks fine and the chain slack is correct, check whether it’s an adjustable flapper. Many modern models have a dial or slide that controls how long the flapper stays open, and a wrong setting mimics a bad flapper without one actually being broken.
What Tools and Parts Do I Need to Fix It?
You don’t need a plumber’s van to stock the right kit. Most fixes come down to four items and a little patience.
Flange plunger. The extra rubber flange extends into the drain opening and forms a far tighter seal than a standard cup plunger, which matters more than people assume.
Toilet auger (closet auger). A short, crank-handled cable built specifically for toilet bends, unlike a drain snake meant for straight pipes.
Adjustable wrench and flashlight. For loosening supply line nuts and inspecting rim jets you can’t see from a normal angle.
Gloves and a bucket. Tank water isn’t sewage, but nobody wants it on bare hands.
For parts, bring the old flapper to the store if you’re replacing one. Flappers come in two main sizes, 2 inch and 3 inch, and grabbing the wrong one means a return trip. Fluidmaster and Korky dominate the replacement market, and both make adjustable flapper models that suit low-flow toilets better than a fixed, one-size flapper. A Fluidmaster fill valve kit typically replaces the entire fill mechanism in under 20 minutes and fixes most “tank not filling” complaints outright.
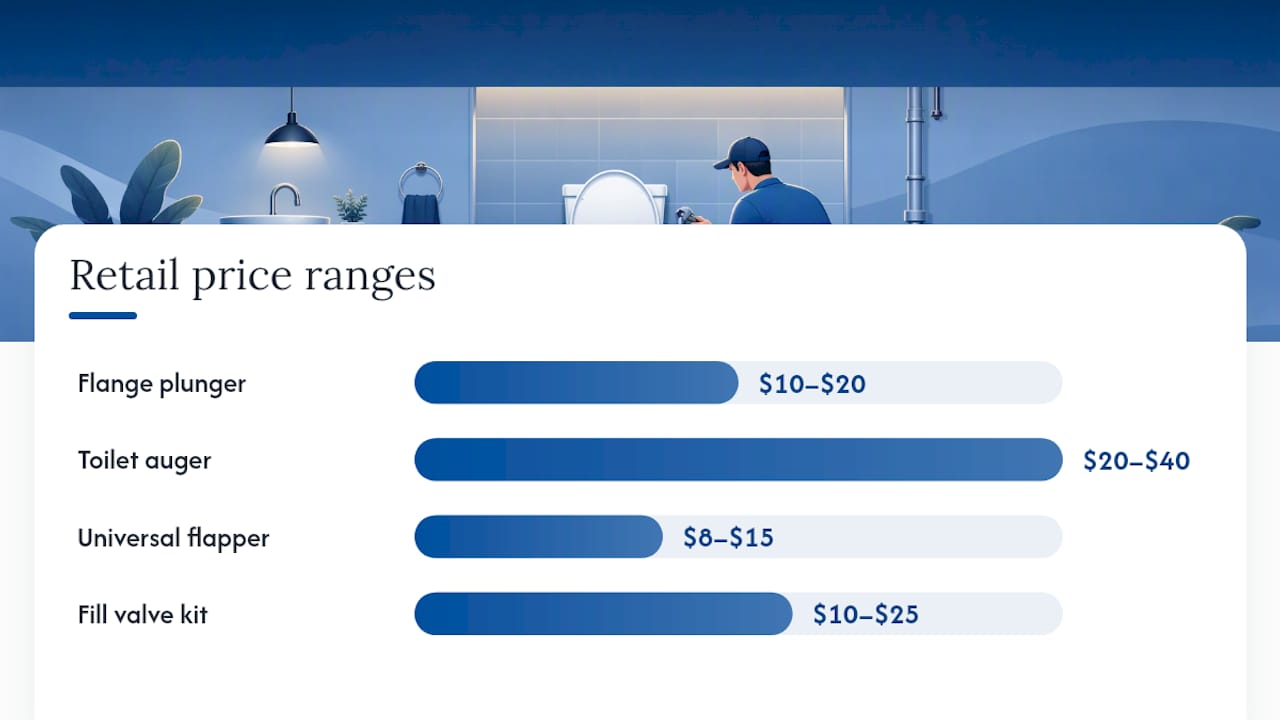
As rough retail ballparks: flange plungers run somewhere in the $10 to $20 range, toilet augers from about $20 to $40, universal flappers around $8 to $15, and fill valve kits typically $10 to $25. Prices vary by brand and store.
Pro Tip: If your toilet is a low-flow model made after 2000, look specifically for an adjustable flapper. Standard flappers often let too much or too little water through on low-flow tanks, which is a common, overlooked cause of chronic weak flushes.
When Should You Call a Plumber Instead of DIY?
Some symptoms mean stop troubleshooting and pick up the phone. Pushing past these points usually just delays the inevitable call and sometimes turns a $200 fix into a $2,000 one.
Call a professional when:
More than one toilet or fixture is failing at the same time
Sewage is backing up into tubs, showers, or floor drains
You hear persistent gurgling from other fixtures during a flush attempt
Plunging and augering properly still hasn’t cleared the blockage
You suspect a problem in the vent stack or main sewer line
If every toilet in the house stops flushing at once, the issue almost always sits in the main line or septic system, not in any single toilet’s tank. No amount of plunging fixes that, and attempting it can push waste backward into the house.
A licensed plumber’s diagnostic process typically includes a camera inspection to visually locate blockages, collapsed pipe sections, or root intrusion, followed by powered snaking or hydro-jetting if the camera shows a stubborn clog. For septic-connected homes, they’ll also check tank levels and drain field function.
Expect a diagnostic visit to run roughly $100 to $300, camera inspections often bundled into that or priced separately around $150 to $500, basic snaking in the $150 to $400 range, and hydro-jetting anywhere from $300 to $600 depending on line length and access. These are general ranges. Actual pricing depends on your home, location, and the severity of the blockage.
Pro Tip: Before you call, jot down what you’ve already tried, when the problem started, and whether other fixtures are affected. A few phone photos of the bowl and tank speed up the diagnosis and often shorten the visit.
Why Does a Toilet Need a Strong Flush to Work at All?
A flush isn’t just water falling into a bowl. It’s a small, engineered siphon event, and understanding it explains why certain fixes actually work.
When you press the handle, the flapper lifts and releases tank water into the bowl through two paths: the rim jets, which are the small holes under the bowl’s rim, and the siphon jet, a larger opening at the bottom that shoots water directly into the trap. The rim jets create the swirling action you see, while the siphon jet does the real work, forcing enough water through the trap to create a siphon that pulls waste and water down and out.
That siphon only forms with enough water volume and pressure. This is why:
Low tank water levels produce a weak, incomplete siphon, even with a perfectly good flapper
Clogged rim jets reduce swirl, which means less water reaches the siphon jet with enough force
Older, high-volume toilets tolerate some jet buildup better than newer low-flow models, which run on tighter margins
Once the siphon breaks, air rushes back in and the bowl refills to its resting level. If your toilet gurgles a little at the end of a normal flush, that’s the siphon breaking exactly as designed. If it never fully engages, you get that frustrating half-flush that leaves waste behind.
How Do I Prevent This From Happening Again?
A little seasonal maintenance keeps most of these problems from coming back at all.
Check the flapper and chain twice a year. Look for warping, mineral crust, or slack that’s drifted out of the quarter to half inch range.
Clean rim jets annually if you’re in a hard water area. Soak a rag in vinegar, press it against the rim opening for 30 minutes, then scrape gently with a wire or old toothbrush.
Run a dye test once a year. Drop food coloring in the tank, wait 15 minutes, and check the bowl for color. This catches slow flapper leaks before they become a full replacement.
Test the refill tube position every time you’re in the tank for another reason. It should sit inside the overflow pipe, not resting beside it.
If you own a low-flow toilet, check the jets more often since they’re more sensitive to buildup than older, higher-volume models. It’s also worth testing your adjustable flapper’s open-duration setting once a year, since a setting that closes too early wastes flush power even when everything else works fine.
Pro Tip: Skip caustic drain cleaners as a routine maintenance step. They can degrade rubber flappers and gaskets over time, which means you’re trading a clog risk for a slow leak risk down the road.
What Local Technicians See Most Often
In the field across Greater San Antonio, the same pattern shows up again and again: a toilet “stops working” and it turns out to be a slipped chain or a flapper that’s been quietly failing for months. Most of these calls end faster than the homeowner expects, because the fix is a $10 part, not a new toilet.
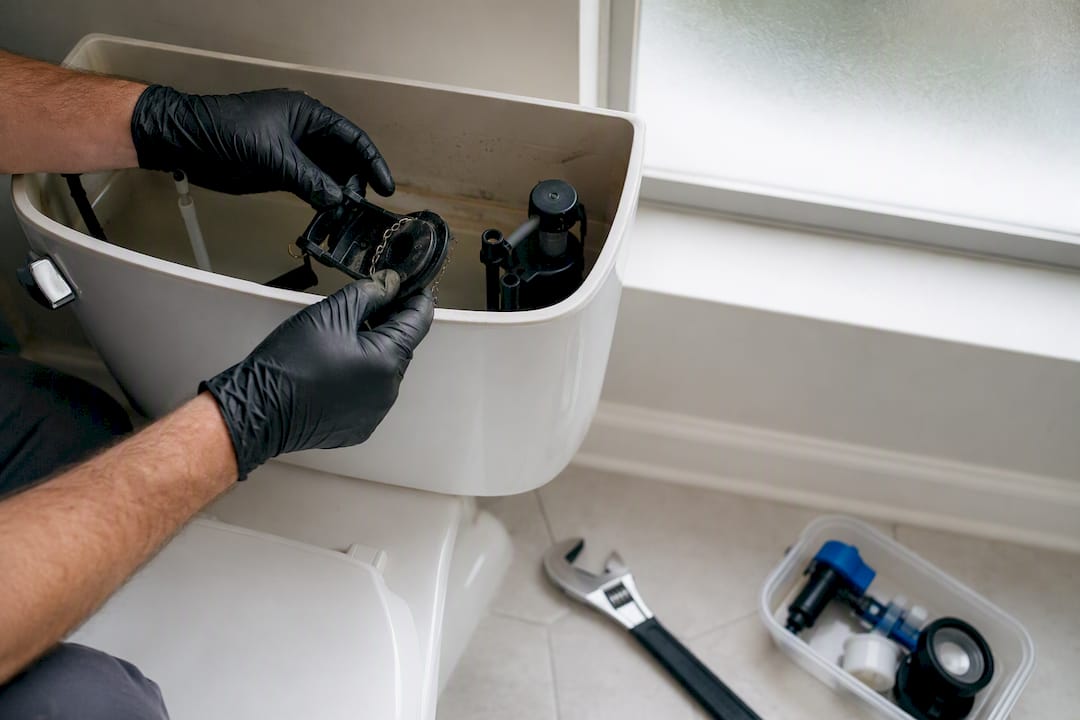
Texas Comfort Crew leans toward repair over replacement whenever the numbers make sense, which is most of the time with flush problems. A full tank rebuild almost always beats swapping the whole unit.
Need a Plumber? Here’s What Texas Comfort Crew Handles
Texas Comfort Crew gives Greater San Antonio homeowners something most one-call plumbers don’t: an honest read on whether your toilet needs a $15 part or a full diagnostic visit, before any truck rolls out. That distinction saves real money on the calls that turn out to be a $10 flapper instead of a service charge for nothing.

When a toilet issue turns out to be more than a tank fix, mainline camera inspections, hydro-jetting, fill-valve and flapper replacement, and emergency service are all part of the standard plumbing lineup. Before calling, have the shutoff valve location handy, note when the problem started, and mention whether other fixtures are affected. That gets a technician to the right diagnosis faster once they arrive. Homeowners in the New Braunfels area can check current availability for New Braunfels service directly, or browse the full service area map to confirm coverage near you. Schedule a diagnostic visit today and get a straight answer on what’s actually wrong before any repair begins.
Sources
FAQ
How do I fix a toilet that won’t flush?
Check the handle, lift chain, and flapper first, since most single-toilet failures start in the tank. If the tank looks fine but the bowl won’t drain, move to a flange plunger, then a toilet auger if plunging doesn’t clear it.
How do I force my toilet to flush?
Pour a large bucket of water into the bowl quickly to mimic the siphon action of a normal flush. This works as a temporary fix while you sort out the actual mechanical or drain issue.
Why is my toilet not flushing when I press the button or handle?
A loose or disconnected lift chain is the most common cause, followed closely by a warped flapper that won’t seal properly. Both are quick, inexpensive fixes you can usually handle in under 15 minutes.
Can I fix a toilet flush without calling a plumber?
Yes, for most cases. Roughly 70% of flush failures are simple mechanical fixes homeowners can handle with basic tools, though multi-fixture failures or persistent clogs need a licensed plumber’s diagnostic equipment.
Recommended
Comments