
What to Do When You Have Low Water Pressure

Anything under 40 psi counts as low water pressure, and anything from 45 to 80 psi is normal for a residential system. Before you touch a wrench, measure it. A $15 to $40 gauge that threads onto an outdoor spigot gives you a real number in under a minute, and that number tells you whether you’re chasing a clogged aerator or a failing pressure regulator.
Try this first:
Confirm the main shutoff and meter valve are fully open, not just cracked.
Unscrew and inspect the aerator on the affected faucet for mineral buildup.
Ask a neighbor if their pressure dropped too. If it did, the problem isn’t yours.
If only one fixture is weak, skip to the fixture fixes below. If the whole house is affected, head straight to the section on PRVs and main valves.
Key Takeaways
Low water pressure is almost always solvable once you know whether the restriction is at the fixture, inside the house, or upstream at the supply.
Point | Details |
Measure first | Test with a hose-bib gauge before replacing anything; below 40 psi is low, 45–80 psi is normal. |
Isolate fixture vs whole-house | If only one fixture is weak, clean the aerator; if all are weak, suspect the PRV or main valve. |
Check for hidden leaks | Watch the water meter’s low-flow indicator with everything off to catch leaks pressure alone won’t reveal. |
Know the cost ranges | PRV work runs $75–450, booster pumps run $800–1,800, and repiping is the largest expense of all. |
Call Texas Comfort Crew for diagnosis | Texas Comfort Crew runs full source-to-fixture testing and repairs PRVs, leaks, and water heaters in the Greater San Antonio area. |
Table of Contents
Fixture-Level Fixes: Aerators, Showerheads, and Valves
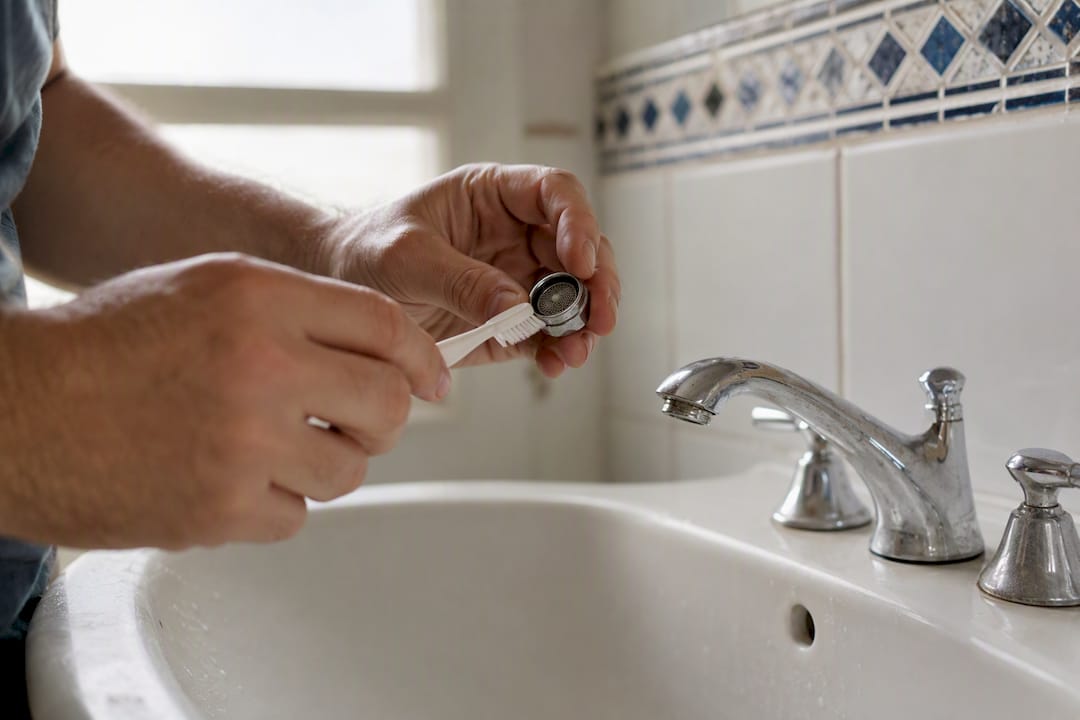
If one sink or shower runs weak while everything else is fine, the problem is almost always local. Mineral deposits clog the tiny mesh screen inside an aerator faster than most people realize, especially in hard-water areas.
Unscrew the aerator from the faucet tip (needle-nose pliers help with stubborn ones) and soak it in white vinegar for 30 to 60 minutes to dissolve scale.
Scrub the showerhead nozzle holes with an old toothbrush, or soak the whole head in a vinegar-filled bag overnight, a fix cleaning professionals recommend as the most common quick win for weak flow.
Check the angle stop valve under the sink or behind the toilet. These small oval handles are frequently left half-open after a repair.
Inspect the flexible supply lines for kinks or crimps, particularly if a dishwasher or washing machine was recently installed nearby.
Pro Tip: Replace a showerhead instead of cleaning it if it’s more than five years old and heavily scaled inside. The internal flow restrictor often degrades along with the mineral buildup, and a new $20 showerhead solves both problems at once.
If other fixtures in the house pull normal pressure, you’re dealing with a fixture-level issue, not a house-wide one.
What Causes Low Water Pressure Throughout the Whole House?
When every faucet and shower runs weak, look upstream of the fixtures. Four causes show up again and again in whole-house cases.
A failing pressure-reducing valve (PRV). These valves are factory-set around 50 to 60 psi and typically last 7 to 15 years before internal components wear out and pressure drops or fluctuates.
A partially closed main or meter valve. This is one of the most common causes after any recent plumbing work, landscaping, or meter replacement. Someone closes it for the job and never fully reopens it.
Municipal supply issues. Water-main flushing and heavy neighborhood demand can temporarily reduce delivered pressure, which is why checking with neighbors matters before you assume the problem is internal.
Corroded or galvanized pipes. Scale builds up on the inside walls of older galvanized pipe gradually, so pressure loss often creeps in over months rather than appearing all at once.
Systems That Quietly Restrict Water Flow
Beyond fixtures and valves, a few mid-level systems can choke flow without any obvious warning sign.
Sediment in your water heater. Tank-style heaters accumulate mineral sediment at the bottom, which restricts hot-water flow specifically. Flushing the tank once a year usually restores it.
A clogged whole-house filter. Compare pressure before and after the filter housing. A big pressure drop across the filter means it’s due for replacement, typically every three to six months depending on the model.
A worn faucet cartridge. If one faucet has weak flow but the shutoff valve and aerator both check out, the internal cartridge may be degraded and due for swapping.
How Do I Test Water Pressure at Home?
A source-to-fixture test plan keeps you from replacing parts you didn’t need to touch. Work in this order.
Thread a pressure gauge onto an outdoor hose bib closest to where the water line enters the house, with all fixtures inside turned off.
Read the gauge. Below 40 psi points to a supply or PRV issue; 40 to 80 psi is normal range; above 80 psi means you need a pressure-reducing valve if you don’t already have one.
Turn off every fixture and appliance, then watch the low-flow indicator on your water meter. If it moves at all, you likely have a hidden leak.
Test pressure immediately before and after your PRV and whole-house filter to isolate which one, if either, is restricting flow.
PSI Reading | What It Means | Next Step |
Below 40 | Low pressure; likely PRV, main valve, or supply issue | Move to whole-house diagnostics |
45–80 | Normal range | Check individual fixtures for local blockage |
Above 80 | High pressure; risks pipe and appliance damage | Install or service a PRV |
If the gauge reads low right at the hose bib, the cause sits upstream of your house, whether that’s the meter, the PRV, or the municipal main. If it reads normal outside but weak at specific fixtures, the restriction is inside your plumbing.
Repairs, Costs, and When to Call a Plumber
Some of this you can handle in an afternoon. Some of it needs a license and a permit.
DIY territory covers aerator cleaning, showerhead swaps, and faucet cartridge replacement, usually under $50 in parts. Everything past that starts to carry real risk of making things worse.
PRV adjustment or replacement typically runs $75 to $450, and it’s a licensed-plumber job because it involves shutting down the main line and sometimes pulling a permit.
Booster pump installation for homes on the far end of a municipal line or with elevation challenges runs roughly $800 to $1,800.
Leak repair costs vary enormously depending on whether the leak is in an accessible wall or under a slab.
Repiping an entire home with corroded galvanized lines is the largest expense on this list and is usually only necessary once scale has narrowed multiple branch lines.
If your gauge test shows the problem sits before your house’s plumbing starts, you’re looking at supply-side or PRV work. If it shows up only at certain fixtures, scale inside older pipe is more likely the culprit, and that’s a conversation worth having with a plumber before sinking money into partial fixes.
A Maintenance Routine That Prevents Repeat Problems
Clean aerators and showerheads every three to six months. Replace whole-house filter cartridges on the manufacturer’s schedule. Flush your water heater annually to keep sediment from building back up.
Watch for rusty water or pressure that worsens gradually over months. That pattern points to pipe scale, not a one-time clog. Keep a simple note of when you last serviced each system.
A maintenance membership with scheduled inspections catches these issues before they become whole-house problems.
Pro Tip: Write the date on your water filter cartridge with a marker when you install it. It takes five seconds and saves you from guessing three months later.
Who’s Behind This Guide
This article is written by Dan Patino.
Texas Comfort Crew provides honest and reliable home repair services specializing in HVAC and plumbing across the Leon Valley, Cibolo, and Live Oak areas, prioritizing repairs over unnecessary replacements whenever a repair genuinely solves the problem.
Transparent communication and thorough evaluations guide every recommendation the crew makes.
Customer education is treated as part of the job, not an afterthought.
Customer feedback consistently points to the quality of the work and the clarity of the communication.
Low Water Pressure on a Private Well System
Well systems fail in ways municipal-supply homes never see, and the checklist above only gets you partway there. If your water comes from a private well and pressure has dropped, the pressure tank is usually the first suspect.
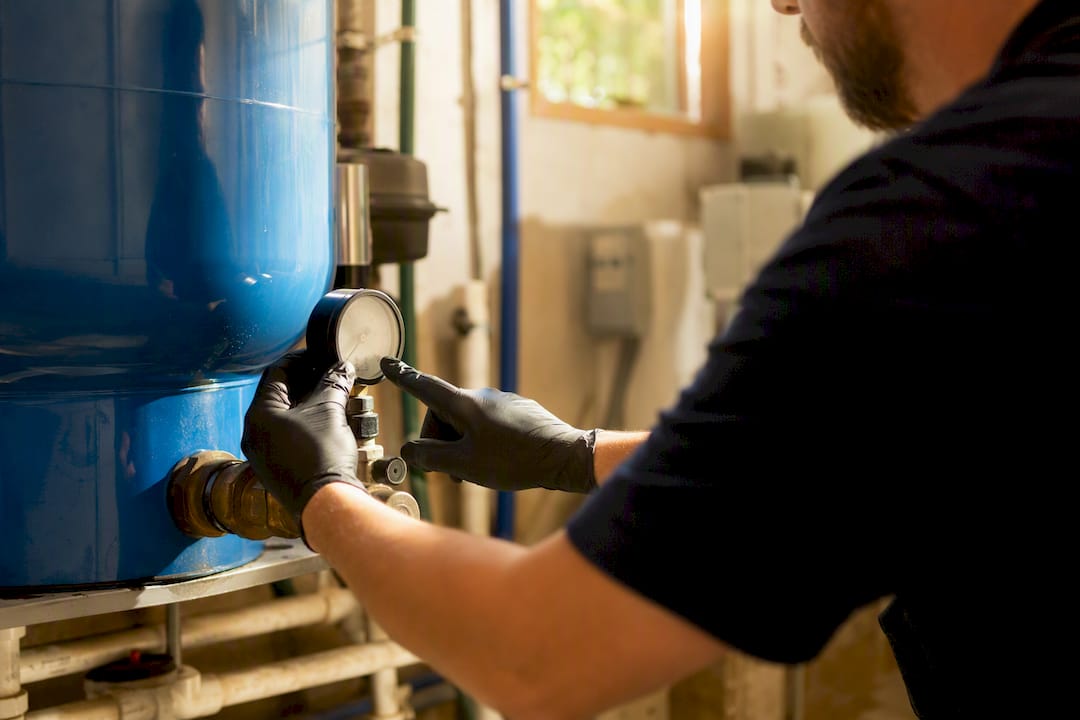
A well’s pressure tank stores pressurized water using an internal air bladder, and the whole system cycles between a cut-in pressure (when the pump kicks on) and a cut-out pressure (when it shuts off), typically a 20 to 40 psi spread. If that bladder waterlogs or loses its air charge, the tank can’t hold pressure between pump cycles, so you get strong flow right after the pump runs and a fast fade after that. That’s a distinct symptom pattern from municipal-supply problems, where pressure tends to be consistently low rather than starting strong and dropping.
A clogged well filter is the second common culprit. Well water often carries more sediment and iron than municipal supply, so the sediment filter ahead of the pressure tank clogs faster and needs more frequent replacement, sometimes monthly depending on water quality. The same before-and-after pressure test that works for whole-house filters applies here.
Pump problems (worn impellers, failing check valves, or a pump sized too small for the household’s demand) are the third possibility, but these are harder to diagnose without pulling the pump, and they’re not a reasonable DIY project. Well systems also fall under different guidance than municipal supply for water quality and safety, and the EPA’s private well resources are worth reviewing if you haven’t had your system inspected recently. If your pressure tank gauge shows a wide swing between pump cycles, or your filter change frequency has crept up noticeably, that’s your signal to bring in someone who works on well systems specifically.
Why Most Low-Pressure Advice Skips the Real Question
Most guides on this topic hand you a list of ten possible causes and leave you to guess which one applies. That’s backwards. The gauge test isn’t optional homework, it’s the entire point. A five-minute reading at the hose bib eliminates seven of the ten causes on that list before you’ve spent a dollar.
The advice that annoys me most is “just clean your aerator and see if it helps.” That works often enough that people keep repeating it, but it wastes time when the real problem is a PRV creeping toward failure after ten years of service. If the gauge reads low outside your house, no amount of aerator cleaning fixes that.
Here’s what I’d prioritize: test first, then fix cheapest to most expensive only after the test tells you where the restriction actually lives. A homeowner who tests before touching anything spends less money overall than one who replaces a showerhead, then a cartridge, then finally calls a plumber three weeks later for the PRV that was the problem all along. Cost discipline in plumbing comes from sequencing, not from avoiding professional help.
— Dan Patino
Get a Professional Diagnosis From Texas Comfort Crew
Texas Comfort Crew’s plumbers run the same source-to-fixture test outlined above, but with the tools and experience to move straight from diagnosis to repair in a single visit. That matters most for PRV work and leak detection, where guessing wrong costs you real money.

The team handles pressure testing, PRV adjustment and replacement, leak detection, water heater flushing, and booster pump installation for homeowners across the Greater San Antonio area, including Spring Branch and the broader service area map if you’re checking local coverage. Every job starts with a repair-first evaluation, so you’re not pushed toward a full repipe when a $150 PRV swap solves the actual problem.
Before you call, have your gauge reading ready if you took one, note which fixtures are affected, and mention any recent plumbing work, landscaping, or meter service. That context alone often cuts diagnostic time in half. Schedule a visit through the plumbing services page and get a straight answer about what’s actually causing the drop.
Sources
FAQ
What do I do if my water pressure is low?
Test it first with a hose-bib pressure gauge, then confirm your main valve is fully open and clean the aerator on the affected fixture. If the whole house is weak, the cause is more likely a failing PRV or main valve than anything at the fixture level.
Is 40 psi water pressure too low?
40 psi sits right at the bottom edge of the normal range, which runs 45 to 80 psi. It’s not dangerously low, but if it’s trending downward or appliances are already struggling, it’s worth investigating before it drops further.
Why is my water pressure low when I use only two faucets?
Running two fixtures at once splits the available flow between them, so weak pressure that only shows up under simultaneous demand often points to undersized supply lines or a partial restriction somewhere upstream, like scale buildup in older galvanized pipe.
Why is my water pressure low but no leak?
A PRV that’s aging out, a partially closed main or meter valve, or scale narrowing your pipes can all cause low pressure with zero leaks involved. Run the meter low-flow indicator test to rule out a hidden leak, then check your PRV if that comes back clean.
Recommended
Comments