
Garbage Disposal Jammed? Here's the Fix That Works
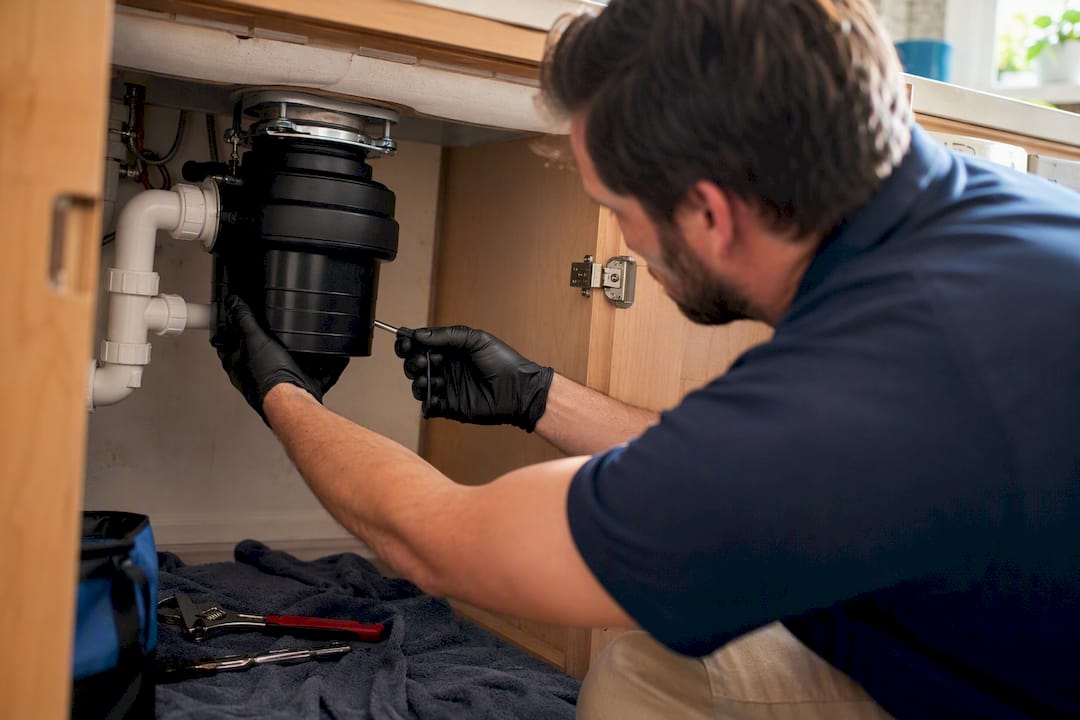
Cut the power at the wall switch or breaker, then check it’s dead. Slide a 1/4" Allen or disposer wrench into the hex port on the bottom of the unit and rotate the flywheel back and forth until it spins freely. Fish out any debris with tongs, press the red reset button, and run cold water for a few seconds to confirm it grinds normally. If the reset button won’t hold or you catch a burning smell, stop and call a professional.
Power off at the switch, outlet, or breaker before touching anything
Rotate the flywheel with a 1/4" hex wrench from the bottom port
Clear debris with tongs, never your hand, then hit reset
Test with cold water; if it hums or trips again, call a pro
Key Takeaways
Freeing a jammed disposal almost always comes down to cutting power, rotating the flywheel with a hex wrench, clearing debris by hand tools only, and resetting before testing with cold water.
Point | Details |
Power off first | Cut power at the switch, outlet, or breaker and confirm it’s dead before touching the unit. |
Use the hex port | A 1/4" Allen wrench in the bottom port frees most jams; steady pressure on stubborn ones helps free the turntable. |
Humming means still jammed | A motor that hums without spinning needs another round with the wrench, not repeated switch flips. |
Check electrical after clearing | A tripped GFCI or breaker often explains why a cleared disposal still won’t start. |
Know when to call a pro | Texas Comfort Crew handles disposal diagnosis and repair-vs-replace decisions for homeowners in the Greater San Antonio area. |
Table of Contents
Safety Steps Before You Touch a Jammed Garbage Disposal
A jammed unit is still wired to a live circuit until you’ve physically cut that connection, and disposals have injured plenty of people who assumed the switch alone was enough.
Flip the wall switch off, then unplug the unit if it’s cord-fed, or trip the breaker if it’s hardwired. A noncontact voltage tester confirms it’s actually dead.
Never put your hand or fingers inside the disposal chamber, even with the power off. Use tongs, needle-nose pliers, or a grabber tool instead.
If you smell burning plastic or see scorched wiring, skip the DIY route entirely and call a licensed technician.
If the sink basin is full of standing water, bail it out first so you can actually see what you’re dealing with.
Pro Tip: Tape a sticky note over the wall switch that says “OFF, DO NOT TURN ON” while you work. It sounds excessive until someone else in the house flips it back on mid repair.
What Tools Do You Need to Unjam a Disposal?
You don’t need a full toolbox. A 1/4" Allen wrench or the factory disposer wrench (sometimes called a wrenchette) is the star of the show, paired with a flashlight so you can actually see into the chamber and a pair of tongs or needle-nose pliers for pulling out debris.
1/4" Allen wrench or the disposer wrench that shipped with the unit
Flashlight to inspect the chamber from above
Tongs or needle-nose pliers, plus work gloves for grip and protection
No wrench on hand? A wooden broom handle or dowel pushed through the sink opening can rotate the turntable from above, according to manufacturer support guidance
Skip metal screwdrivers, wire hangers, and any power tool. They can slip, gouge the grind ring, or push debris deeper instead of freeing it.
How Do You Unjam a Garbage Disposal Step by Step?
This is the sequence manufacturers actually recommend, and it handles the overwhelming majority of jams without a service call.
Confirm power is off. Check the wall switch, the breaker panel, and unplug the unit if possible. Bail standing water from the sink so you can see the drain opening.
Find the hex port and insert your wrench. It’s the small indentation on the bottom center of the disposal, accessible from under the sink. Push the wrench in until it seats, then rotate. On a stubborn jam, applying steady pressure in one direction for a short period tends to free the turntable more reliably than rapid back-and-forth rocking. You’ll feel the flywheel loosen and spin through a full rotation once it’s clear.
Inspect from above with a flashlight. With power still off, look down into the chamber. Use tongs or pliers to pull out anything visible, whether that’s a spoon, a peach pit, or a shard of glass. Never reach in by hand.
Press reset and test. The reset button sits on the bottom or lower back of the unit. Push it in until it clicks, restore power, and run cold water while you flip the switch briefly to test.
If the disposal hums but doesn’t spin, the flywheel is still jammed somewhere the wrench didn’t reach. Power it off immediately and repeat steps 2 and 3. A humming motor that won’t spin almost always signals a jam, and letting it hum for more than a few seconds risks burning out the windings. Don’t keep flipping the switch hoping it’ll catch. That’s how a fixable jam turns into a dead motor.
Why Won’t the Disposal Turn On After Resetting It?
Clearing the jam doesn’t always mean the unit fires back up right away. Electrical gremlins are common culprits, and most are easy to rule out yourself.
Locate the red reset button on the bottom or lower back of the housing and press firmly until it clicks. If it’s hot to the touch or won’t stay depressed, give it 10 to 20 minutes to cool before trying again.
Confirm the unit is actually plugged in, then check the outlet itself and any GFCI outlet upstream on the same circuit. A tripped GFCI is one of the most overlooked reasons a disposal “dies” after a jam. If you’re unsure whether your kitchen circuit runs through a GFCI breaker or a GFCI outlet, that distinction matters for where you go looking to reset it.
Check the breaker panel for a tripped switch and reset it if needed.
If the disposal makes zero sound after all of that, the problem is likely wiring or a failed motor rather than a jam. That’s a job for a licensed technician, not another round of poking with a wrench.
When Should You Stop and Call a Plumber?
Some symptoms mean the smart move is to put the wrench down entirely.
Visible smoke, a burning smell, or melted plastic near the unit means stop immediately and call for service.
The reset button keeps popping, or the breaker trips repeatedly even after you’ve cleared the visible jam.
Persistent leaks under the sink, loud banging, grinding bearings, or a metallic screech all point to mechanical failure, not a simple jam.
The unit is old and this isn’t the first jam this year. Repeated failures on an aging disposal usually cost more to keep patching than to replace outright.
A disposal that trips its overload repeatedly after a jam is cleared often has a partially shorted motor winding, and continued DIY attempts risk finishing the job the jam started.
How Can You Prevent a Garbage Disposal From Jamming Again?
Most jams are self-inflicted, and a few habit changes cut the odds dramatically.
Run cold water before you start grinding, keep it running during, and let it flow another 10 to 15 seconds after you’re done.
Keep fibrous stuff like celery, corn husks, and onion skins out, along with grease, large bones, and big handfuls of coffee grounds.
Feed waste in small batches rather than dumping a full plate in at once, and install a sink strainer to catch stray utensils before they ever reach the blades.
Run ice cubes and citrus peels through occasionally. They knock loose residue and leave the chamber smelling better than any drain cleaner will.
When in doubt about whether something belongs in there, throw it in the trash instead. Grease, fibrous scraps, and hard debris are the repeat offenders behind most service calls.
Pro Tip: Keep a small container by the sink for “definitely not the disposal” scraps, like avocado pits and chicken bones. It takes the guesswork out of the moment and saves your knuckles from ever needing a wrench.
How Texas Comfort Crew Handles a Jammed Disposal Call
Most jams end at the reset button. When they don’t, the diagnosis matters more than the repair itself. Texas Comfort Crew’s approach starts with the same safety checks covered here, power isolation, a hex-port check, and a look for wedged debris, before ever reaching for a tool that costs the homeowner money.
A disposal call is rarely just about the disposal. It’s about whether the fix holds, whether the motor is actually salvageable, and whether the homeowner walks away understanding what happened and why.
Dan Patino and the Texas Comfort Crew team have built their plumbing work in the Greater San Antonio area around one principle: fix what can be fixed before recommending a replacement. That means a technician on a disposal visit checks wiring, tests the outlet and breaker, and only recommends swapping the unit when the motor or mounting is actually done.
What This Fix Actually Teaches You About Your Disposal
The conventional advice on jammed disposals usually stops at “use the hex wrench,” which is correct but incomplete. The bigger lesson is that a disposal jam is almost never really about the jam. It’s about what got dropped in there in the first place, and whether the motor survived the humming that followed.
I’d push back on one common instinct: reaching for the switch again and again when the unit hums instead of spins. That single habit, more than any bone or fork, is probably responsible for more dead disposal motors than actual jams are. The wrench-and-reset method works because it treats the cause, not the symptom.
What deserves more attention than it gets is the electrical side. Homeowners troubleshoot the mechanical jam for twenty minutes and never check the GFCI outlet upstream. If your fix checklist ends at “pressed reset,” it’s incomplete. Check the outlet before you assume the motor is dead.
Get Professional Help When DIY Isn’t Enough
Texas Comfort Crew exists for the moment this guide runs out. If you’ve cleared the jam, checked the outlet, reset the breaker, and the disposal still sits silent, that’s not a DIY project anymore. It’s a wiring or motor issue, and pushing further risks turning a $150 repair into a full replacement.

Texas Comfort Crew’s plumbing team diagnoses disposals, water heaters, and drain lines across the Greater San Antonio area with one rule guiding every visit: repair before replace, and explain every recommendation so you’re never guessing why a part costs what it costs. Homeowners across the service area, including neighborhoods served through the Stone Oak service area and the New Braunfels service area, can book a plumbing visit and get a straight answer on whether the disposal needs a repair or a replacement, no upsell required. If your unit is silent after every trick in this guide, schedule a plumbing visit and get it sorted before a small jam becomes a bigger repair.
Sources
FAQ
How do you fix a garbage disposal that just hums?
Humming without spinning means the flywheel is still jammed. Power off the unit, insert a hex wrench into the bottom port, and rotate until it turns freely, then test again with cold water.
What causes a garbage disposal to jam?
Hard bones, fruit pits, metal utensils, fibrous scraps like celery and corn husks, and glass are the most common culprits that wedge between the turntable and grind ring.

What can you pour down a garbage disposal to unclog it?
Nothing you pour will fix a mechanical jam. Running cold water helps flush debris once the flywheel is freed, but chemical drain cleaners can damage the unit’s seals and gaskets.
Your garbage disposal has metal stuck inside. How do you fix it?
Cut the power completely, then remove the metal object with tongs or needle-nose pliers only, never your hand. If the object caused damage to the blades or grind ring, Texas Comfort Crew can inspect it and advise on repair versus replacement.
Recommended
Comments