
Prevent $600 Summer Repairs: AC Tune Up Checklist for San Antonio
An AC tune-up is a preventative service that inspects, cleans, and adjusts your cooling system to run more efficiently and break down less often. The top six checks any technician (or thorough homeowner) should hit are air filters, evaporator and condenser coils, refrigerant levels, the condensate drain, electrical connections, and thermostat calibration. Schedule it in spring, before cooling season hits, and leave refrigerant and electrical work to a licensed pro.
TL;DR:
Regularly check and replace air filters and clear debris around the outdoor unit to prevent airflow restrictions and maintain system efficiency.
Ensure condenser fins are gently brushed and rinsed without power washers to avoid damage that reduces heat rejection capacity.
Have a licensed technician inspect electrical connections, refrigerant pressure, and refrigerant leaks, which are less common but more costly when ignored.
Confirm that all supply and return registers are open and ductwork is free of leaks or blockages to support optimal airflow and cooling performance.
Schedule an annual professional tune-up in spring to catch small issues before they lead to expensive mid-season failures.
Table of Contents
The Full AC Tune-Up Checklist
A proper maintenance check should include thermostat checks, tightening electrical connections, lubrication of moving parts, condensate drain inspection, and coil cleaning, among other steps. Here’s the fuller sequence, in the order most technicians actually work through it:
Replace or clean the air filter — should slide in cleanly with no visible dust clogging.
Clear outdoor unit debris — 2 feet of clearance on all sides, airflow unobstructed.
Inspect and gently clean condenser fins — straight, unbent, free of dirt buildup.
Check condenser fan blade and motor — spins freely, no wobble or grinding noise.
Inspect evaporator coil — no visible frost, mold, or heavy dust.
Test blower wheel and motor — quiet operation, consistent airflow.
Flush the condensate drain line — flows freely with no standing water.
Tighten electrical connections (licensed tech only) — no loose terminals.
Test capacitors and contactors (licensed tech only) — smooth start, no humming.
Check refrigerant pressure (licensed tech only) — matches manufacturer spec.
Calibrate thermostat — setpoint matches actual room temperature.
Measure temperature split — 15 to 20 degrees between return and supply air.
Inspect ductwork and registers — no visible leaks, blockages, or crushed sections.
Test safety controls and disconnect switch — accessible, labeled, functioning.
Record baseline readings — amp draw, pressures, and filter status logged for next visit.
What Should You Check on the Outdoor Unit?
The condenser sits outside taking a beating from grass clippings, cottonwood fluff, and whatever else the wind carries. Keeping at least 2 feet of clearance on all sides matters more than people realize. Restrict that airflow and the whole system works harder to reject heat, which shows up as higher bills and shorter equipment life.
Clear leaves, grass, and mulch away from the base and top grille.
Brush fins gently with a soft brush, then rinse top to bottom with a garden hose. Manufacturer guidance consistently warns against power washers, since the water pressure bends fins and reduces airflow permanently.
Spin the fan blade by hand (power off) to check for wobble, listen for grinding on startup.
If fins are already bent or the coil looks caked in grime beyond a quick rinse, that’s a job for a technician.
Pro Tip: A bent fin doesn’t just look bad. Even a small section flattened by a hose blast can knock a few percentage points off your system’s heat rejection capacity.
Indoor Coil, Blower, and Filter Maintenance
The evaporator coil lives inside the air handler, usually behind a panel that requires some disassembly. It’s harder to inspect than the outdoor unit, and heavy buildup on it usually means a technician visit rather than a DIY fix.
Look for frost, mold, or a dust layer thick enough to restrict airflow across the coil.
Inspect the blower wheel for caked dust, since a dirty blower cuts airflow even when the filter is clean.
Lubricate motor bearings only if your model has oil ports; many modern motors are sealed and need no lubrication at all.
Check filter fit and consider a MERV 8 to 13 filter for typical homes, replacing it every 60 to 90 days, or monthly if you have pets. Routine filter changes and clear outdoor units are two of the few tune-up tasks most homeowners can handle safely on their own.
Glance at the drain pan and nearby ductwork for obvious cracks or standing water.
Which Electrical Components Need Inspection?
Electrical failures are one of the more common reasons an AC won’t start at all, and they’re also where DIY attempts get dangerous fast.
Tighten wire connections at the contactor and disconnect box.
Inspect wiring insulation for cracking, scorching, or rodent damage.
Test relays and the contactor for pitting or stuck contacts.
Check start and run capacitors. A capacitor that’s failing often shows up as a slow motor start or a humming sound rather than a total shutdown.
Confirm the disconnect switch is accessible and properly labeled.
Amperage and voltage readings require a meter and training most homeowners don’t have. If your unit is struggling to start, our guide on an AC that won’t turn on walks through the safe checks before you call anyone.
How Do Airflow and Ductwork Affect Performance?
Airflow problems quietly wreck efficiency without ever showing an obvious symptom besides higher bills and uneven cooling. A clogged filter is the single biggest culprit, followed by closed or blocked registers.
Walk the house and confirm every supply and return register is open and not blocked by furniture or rugs.
Look at exposed duct sections in the attic or crawlspace for disconnected joints, crushed flex duct, or torn insulation.
Feel for weak airflow at registers farthest from the air handler, a common sign of a duct leak or undersized returns.
If airflow feels weak throughout the house despite a clean filter, ask a technician about a static pressure test, a diagnostic that measures resistance in the duct system and can only be done with specialized gauges.
What Refrigerant Checks Should a Technician Perform?
Low refrigerant shows up as weak cooling, ice forming on the copper line, or the system running long cycles without hitting the setpoint. It’s never something you top off casually. A technician tune-up inspects, cleans, and adjusts the system, and refrigerant pressure checks are squarely in that professional lane.
Only licensed technicians can legally handle refrigerant under EPA rules.
Techs measure suction and head pressures and compare them against the manufacturer’s target range for that specific system.
Oily residue near fittings, hissing sounds, or ice buildup on the refrigerant line all point to a leak.
Recharging without finding the leak first just means you’re paying for the same fix again in a few months.
Why Does the Condensate Drain Need Regular Attention?
A clogged condensate line is one of the most common reasons homes end up with water stains or a system that shuts itself off mid-summer, as explained in Mold in Air Ducts: What Every Homeowner Must Do. Clogged drains are a frequent cause of service calls and can lead to real water damage if ignored.
Watch for puddles near the air handler, a musty smell, or a system that shuts off with an error light (many units have a float switch that kills operation when the pan fills).
A wet/dry vacuum at the outdoor termination point, or a cup of vinegar poured down the indoor access port, clears light clogs.
If water backs up again within days, or you spot standing water in the drain pan itself, the line or the pan may need a technician’s repair.
Pro Tip: Pour that vinegar flush every few months during cooling season, not just once a year. Algae grows back fast in warm, humid drain lines.
How Do You Verify the System Is Actually Working?
Cleaning and tightening things matters, but the real proof is in performance numbers.
Calibrate the thermostat and confirm the display temperature matches an independent thermometer in the room.
Run a start-up test: listen for unusual noise, watch how long the cycle takes to kick in, and check that it shuts off cleanly.
Measure the temperature split between return and supply air. Technicians typically record this split along with amp draw and refrigerant pressures as baseline data for future visits.
A split under 15 degrees or over 20 degrees usually flags a problem worth investigating further.
What Final Safety Checks Should Happen?
The last pass of a tune-up is about confirming the system won’t fail dangerously, not just inefficiently.
Test the disconnect switch, float switch, and any high pressure safety shutoffs.
For homes with a furnace sharing the air handler, the heat exchanger and carbon monoxide levels get inspected separately from the AC checks.
A technician should hand you (or keep on file) the amp readings, refrigerant pressures, and filter condition noted during the visit.
Keep your own simple log, even a phone note with dates and a photo of the filter, so you can spot patterns year over year.
Which Tasks Are Safe for DIY, and Which Need a Pro?
Splitting these correctly is where homeowners either save real money or accidentally void a warranty. Filter changes, debris clearing, and basic condensate flushing are reasonable for most homeowners, but sealed-system and electrical work is not.
Safe to DIY: filter swaps, clearing leaves and debris around the outdoor unit, flushing the condensate line, replacing thermostat batteries.
Leave to a pro: refrigerant handling, capacitor or contactor replacement, coil cleaning beyond a light rinse, any wiring repair.
Recommended cadence: a quick homeowner check monthly during cooling season, plus one full professional tune-up every spring.
Pro Tip: If you’re tackling four or more service calls a year on your own system, a maintenance membership usually pays for itself in avoided repair bills alone.
Where This Checklist Comes From
This checklist reflects what actually shows up on service tickets around San Antonio: units that stopped cooling from a clogged drain, capacitors that failed mid-July, and coils nobody had rinsed off in three years. If you’re chasing a specific symptom right now, our guides on AC not cooling and AC leaking water go deeper into single-issue troubleshooting, written by Dan Patino for homeowners who want a straight answer before they call anyone out.
Why Most Tune-Up Advice Misses the Point
Most articles on this topic read like a technician’s internal checklist copied and pasted for the public, heavy on tasks and light on why any of it matters to a homeowner’s wallet. The honest framing is simpler: a tune-up is not about making your AC “like new.” It’s about catching the three or four things that turn into a $600 emergency call if you ignore them for another summer, a weak capacitor, a slow drain clog, a fin buildup that’s quietly raising your compressor’s workload.
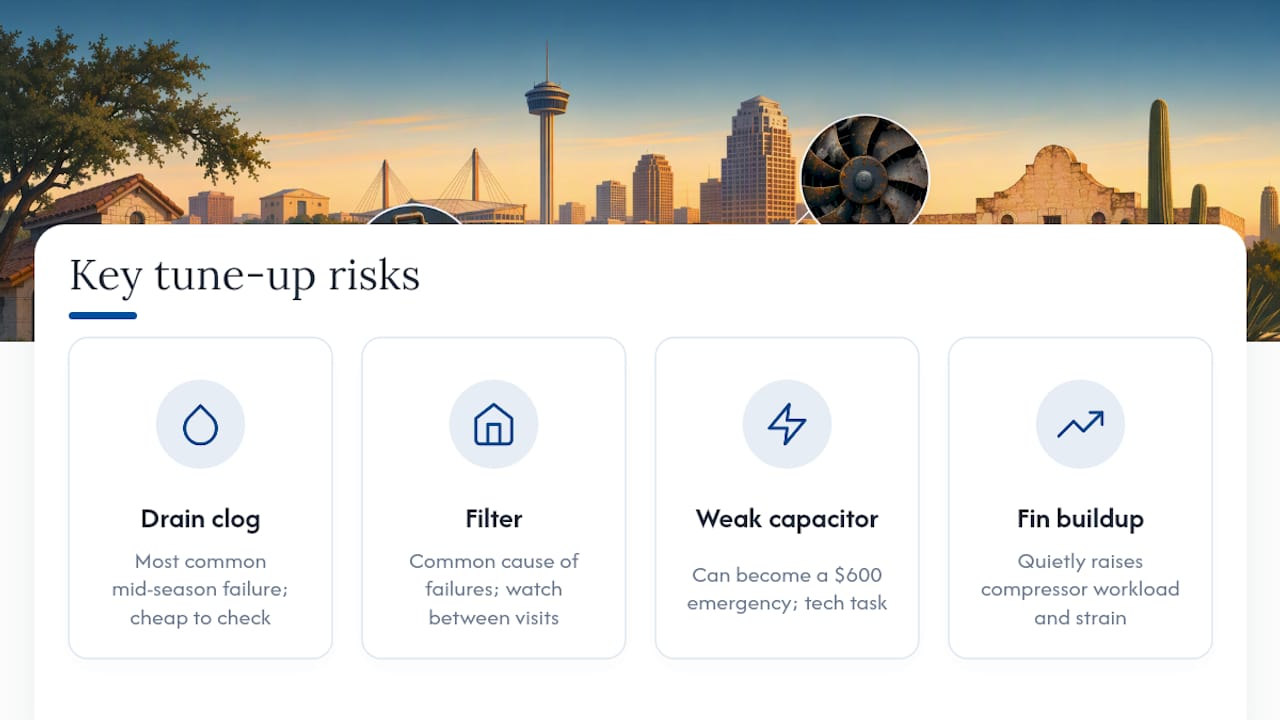
Where conventional advice falls short is treating every item on the list as equally urgent. It isn’t. Filters and drain clogs cause more mid-season failures than anything else on this checklist, and both are things a homeowner can watch between professional visits. Refrigerant and electrical issues are rarer but far more expensive when they hit, which is exactly why they belong to a licensed technician instead of a YouTube tutorial.
If you take one thing from this list, prioritize the drain line and the filter first. They’re the cheapest to check and the most common reason a perfectly good system fails on the hottest day of the year.
— Dan Patino
Book a Spring AC Tune-Up With Texas Comfort Crew
A tune-up visit typically covers the checklist above, coils, filters, electrical connections, refrigerant pressure, and thermostat calibration, with a written report of what was checked and what, if anything, needs follow-up.

Homeowners who sign up for a maintenance membership get priority scheduling ahead of the summer rush plus discounted rates on repairs, which matters once every other homeowner in the county is calling for AC help in July. Pricing is discussed upfront, before any work starts, and the same repair-first approach applies whether it’s your AC or a plumbing issue down the line. If you’re in the Greater San Antonio area, schedule your spring tune-up before the heat arrives and the wait times climb with it.
Sources
For technical specs and safety standards beyond this checklist, the ENERGY STAR maintenance guide, Energy, and manufacturer resources from Bryant, Carrier, and Lennox offer the most reliable official guidance, alongside practical homeowner tips from This Old House.
FAQ
What Is Included in a Standard AC Tune-Up?
A standard tune-up covers filter checks, coil cleaning, refrigerant pressure verification, condensate drain flushing, electrical connection tightening, and thermostat calibration, plus a final performance test.
How Often Should I Get an AC Tune-Up?
Once a year, ideally in spring before cooling season starts, since contractor availability drops once summer heat hits and problems are cheaper to catch early.
Can I Do My Own AC Tune-Up?
You can handle filter changes, clearing debris around the outdoor unit, and basic condensate drain flushing, but refrigerant handling and electrical repairs require a licensed technician.
How Much Does a Professional AC Tune-Up Cost?
Pricing varies by region and system size. For detailed pricing information, please visit the company’s website or contact them directly.
What Happens If I Skip My Annual AC Tune-Up?
Skipping it raises the odds of a mid-season breakdown, since small issues like a slow drain clog or a weakening capacitor tend to turn into full system failures under summer load.
Recommended
Comments